After running into a roadblock while attempting to build the Intel I915 driver as a kernel module for CoreOS, it became clear that we would need to build a completely custom CoreOS kernel with the drivers and features we need enabled.
Thankfully the CoreOS developers have provided us with a set of tools and documentation to help make this process a bit easier:
CoreOS Container Linux developer SDK
CoreOS is all open source and made up of a couple dozen git repositories, which are then glued together and compiled by the tools included in the SDK.
The SDK tools are meant to be installed on a computer running Linux, however to make things easier for myself I created a CentOS VM using a simple Vagrantfile:
Vagrant.configure("2") do |config|
    config.vm.box = "centos/7"

    config.vm.provider "virtualbox" do |v|
        v.name = "coreos_builder"
        v.memory = 11264
        v.cpus = 4
    end

    config.vm.provision "shell", path: "provisioner.sh"
end
You’ll want to give as much CPU and RAM as you can, as the build and compilation steps are time consuming (I’m talking multiple hours here).
Building Vanilla CoreOS
The first thing I want to do is build a vanilla version of CoreOS without any changes. To do this we’ll create a provisioner.sh script
and populate it as follows:
#!/usr/bin/env bash

## Prerequisites

yum install -y \
    ca-certificates \
    curl \
    git \
    bzip2

cd /usr/bin && \
    curl -L -o cork https://github.com/coreos/mantle/releases/download/v0.11.1/cork-0.11.1-amd64 && \
    chmod +x cork && \
    which cork

## Using Cork
# https://coreos.com/os/docs/latest/sdk-modifying-coreos.html

exec sudo -u vagrant /bin/sh - << 'EOF'
whoami
git config --global user.email "jason@thesparktree.com" && \
git config --global user.name "Jason Kulatunga"

mkdir -p ~/coreos-sdk
cd ~/coreos-sdk
cork create

cork enter
grep NAME /etc/os-release

./set_shared_user_password.sh mediadepot
./setup_board
./build_packages
./build_image

EOF
As you can see the Prerequsites section is pretty straight forward, we download & install the SDK dependencies as listed
in their documentation and download the cork tool.
Then the script gets a bit interesting. We tell Vagrant to execute the following commands as the vagrant user, rather than
the default root user used during provisioning. This is due to the fact that the cork tool expects to be run as a regular user
not root.
So we’ll verify that we’re running as vagrant using whoami, then configure the git tool
Then we’ll go back to the steps mentioned in the SDK guide, creating a folder for the SDK to manage, and finally running the cork
commands.
cork createwill download and unpack the SDK into the current directorycork enterwill enter achrootwith additional SDK tools that we can then use to download & compile our coreos image
Now that we have a Vagrantfile and provisioner.sh script, we can verify our VM configuration and run vagrant up to build and provision
our VM.
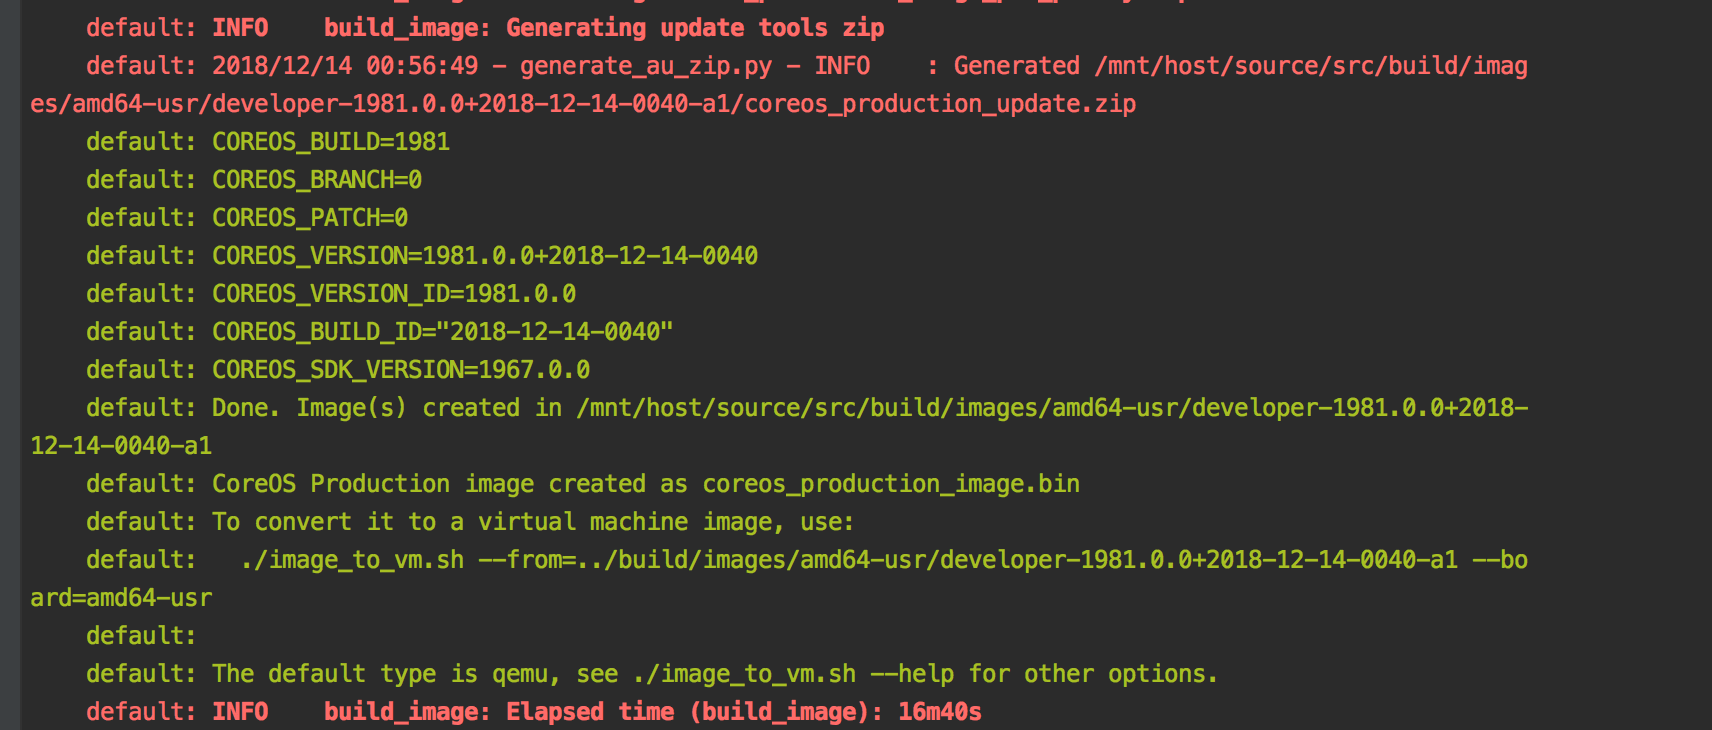
vagrant up took more than 4 hours to complete on my machine (how long did it take you?). Once complete, you should be greeted with a success
message that looks like the following:
At this point we’ve verified that our base tooling is installed correctly, and that we can build CoreOS images. Now we need to start our kernel customizations.
Forking CoreOS Source Repos
As I mentioned earlier, CoreOS is broken up into a couple dozen git repos, but the primary repo is called coreos/manifest.
Looking at the master.xml makes it clear why manifest is so
important: It references all the other git repos that are used when building CoreOS
The first thing we’re going to do is fork and clone repo so that we can customize the repos used to ones that contain our changes.
I forked coreos/manifest to mediadepot/coreos-manifest and then ran
git clone git@github.com:mediadepot/coreos-manifest.git
You may have noticed that there’s a ton of branches in this repo. These branches are all prefixed with build-. These build- branches
are how CoreOS manages versioning and directly matches the major version specified in https://coreos.com/releases/
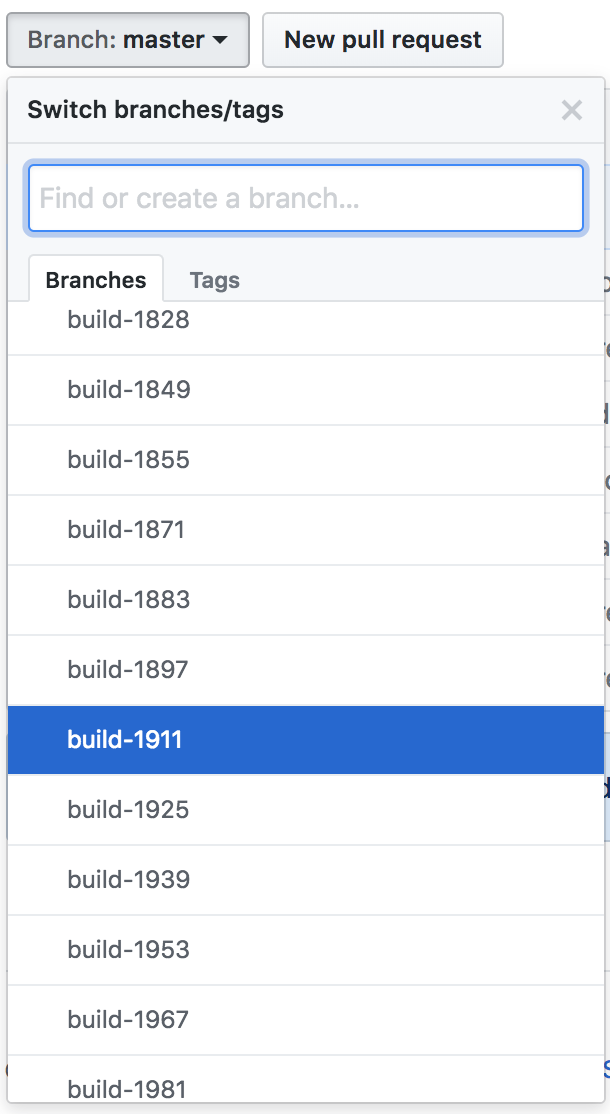
In my case I want to build my custom image off of the current CoreOS Stable version which is 1911.4.0.
To do this, I’ll checkout the build-1911 branch, and then create a new branch ontop of that:
git checkout build-1911
git checkout -b mediadepot
git commit --allow-empty -m "Mediadepot branch created from build-1911"
git push
Now you’ll have a branch built off the latest stable release that’s ready to work with.
Now we’ll want to look at the master.xml file and determine the referenced repos that we need to fork. Since we only to customize the CoreOS kernel, there’s only a couple of repos that are relevant, we can leave the rest unchanged.
- coreos/coreos-overlay - contains Container Linux specific packages and Gentoo packages that differ from their upstream Gentoo versions. This is also where the CoreOS kernel customizations are contained.
- coreos/init - contains
coreos_installerscript which is executed from bootable ISO. Needs to be modified to point to our custom image webhost. - (OPTIONAL) coreos/scripts - contains various scripts used for packaging/maintaining CoreOS. We only care about this repo because we can use it to change the release version file that gets written to the server after installation, which is great for validation
As with coreos/manifest, we’ll fork these repos, and create a new branch that is based on the build-1911 branch.
git clone git@github.com:mediadepot/coreos-overlay.git
cd coreos-overlay
git checkout build-1911
git checkout -b mediadepot
git commit --allow-empty -m "Mediadepot branch created from build-1911"
git push

cd ..
git clone git@github.com:mediadepot/coreos-init.git
cd coreos-init
git checkout master
git checkout -b mediadepot
git commit --allow-empty -m "Mediadepot branch created from master"
git push

cd ..
git clone git@github.com:mediadepot/coreos-scripts.git
cd coreos-scripts
git checkout build-1911
git checkout -b mediadepot
git commit --allow-empty -m "Mediadepot branch created from build-1911"
git push
Modify the Manifest
At this point we’ve forked our target repos, but the manifest doesn’t know about them. It’s time to remedy that.
We’re going to modify master.xml so that references to coreos/scripts and coreos/coreos-overlay point to our new
repos and branches
## HOST ##
cat coreos-manifest/master.xml

<project path="src/scripts"
    name="mediadepot/coreos-scripts"
    revision="mediadepot"
    groups="minilayout" />

...
  <project path="src/third_party/init"
    name="mediadepot/coreos-init"
    revision="mediadepot"
    groups="minilayout" />
...
<project path="src/third_party/coreos-overlay"
    name="mediadepot/coreos-overlay"
    revision="mediadepot"
    groups="minilayout" />
Note the changes to the name attribute and the addition of the revision="mediadepot" attribute.
Making Changes
Before we go further, lets list all the changes we need to make to the CoreOS source.
- Customize the linux kernel options to enable the
i915driver - Customization of
coreos_installscript to point to our custom image storage - Customize the OS_NAME in
/etc/lsb_release, for easy verification - (OPTIONAL) Sign up for Google Cloud Platform, create a storage bucket and service account
Custom Kernel
Let’s start by making changes to the coreos-overlay since that’s where the linux kernel customization code for CoreOS exists.
The file containing the kernel config options for our CoreOS build can be found in sys-kernel/coreos-modules/files/amd64_defconfig-4.14
However we still need to determine the kernel options that we need to enable.
Once again we go back to the coreos_developer_container that we used in Customize CoreOS Kernel - Part 1
We’ll run make menuconfig in the usr/src/linux directory to select all our kernel options, follow the remaining steps in the previous post,
and then we’ll run a new command: scripts/diffconfig .config.old .config
The output from this command is basically a diff listing all the changes necessary to enable your selected kernel customizations from the base CoreOS kernel.
We’ll need to massage the output a bit by removing + characters, transitions and prefixing each line with CONFIG_. We’ll end up with something like this:
CONFIG_AGP=y
CONFIG_BACKLIGHT_CLASS_DEVICE=m
CONFIG_DMA_SHARED_BUFFER=y
CONFIG_DRM=m
CONFIG_FB_SYS_COPYAREA=y
CONFIG_FB_SYS_FILLRECT=y
CONFIG_FB_SYS_FOPS=y
CONFIG_FB_SYS_IMAGEBLIT=y
CONFIG_I2C=y
CONFIG_I2C_ALGOBIT=y
CONFIG_LOGO=y
CONFIG_REGMAP_I2C=y
CONFIG_RTC_I2C_AND_SPI=y
CONFIG_SYNC_FILE=y
CONFIG_ACPI_I2C_OPREGION=y
CONFIG_ACPI_VIDEO=m
CONFIG_BACKLIGHT_GENERIC=m
CONFIG_DRM_BRIDGE=y
CONFIG_DRM_FBDEV_EMULATION=y
CONFIG_DRM_FBDEV_OVERALLOC=100
CONFIG_DRM_I915=m
CONFIG_DRM_I915_CAPTURE_ERROR=y
CONFIG_DRM_I915_COMPRESS_ERROR=y
CONFIG_DRM_I915_USERPTR=y
CONFIG_DRM_KMS_FB_HELPER=y
CONFIG_DRM_KMS_HELPER=y
CONFIG_DRM_MIPI_DSI=y
CONFIG_DRM_PANEL=y
CONFIG_DRM_PANEL_BRIDGE=y
CONFIG_HDMI=y
CONFIG_INTEL_GTT=m
CONFIG_INTERVAL_TREE=y
CONFIG_LOGO_LINUX_CLUT224=y
CONFIG_LOGO_LINUX_MONO=y
CONFIG_LOGO_LINUX_VGA16=y
We can now paste this content at the bottom of our sys-kernel/coreos-modules/files/amd64_defconfig-4.14 file and commit
the change to our branch.
We’ll also want to customize the coreos-base/coreos-init/coreos-init-9999.ebuild file, pointing this package to our forked repo:
CROS_WORKON_PROJECT="mediadepot/coreos-init"
CROS_WORKON_LOCALNAME="init"
CROS_WORKON_REPO="git://github.com"

if [[ "${PV}" == 9999 ]]; then
	KEYWORDS="~amd64 ~arm ~arm64 ~x86"
else
	CROS_WORKON_COMMIT="mediadepot"
	KEYWORDS="amd64 arm arm64 x86"
fi
Here’s a diff showing my changes to the mediadepot/coreos-overlay repo
ISO Installer Custom Hosting
If you’ve been following along so far, you may think that creating a custom .bin file is enough, but I learned the hard way that’s incorrect.
The build_image command in the provisioner.sh script will build a .bin file for us, but we need a bootable .iso.
Thankfully the CoreOS devs created a tool called image_to_vm.sh which (confusingly) can be used to create bootable .iso images.
Not so fast.
While we now have a bootable .iso that uses our custom kernel, the coreos-install script in the .iso actually
downloads a vanilla .bin file from the public CoreOS mirror and installs that .bin to the host machine.
We’ll need open our fork of coreos/init: mediadepot/coreos-init and update the coreos-install script:
- to point to our custom BASE_URL (where we’ll be hosting our images)
- remove some GPG signing requirements (I know, I know, we’ll add them back later)
Here’s a diff showing my changes to the mediadepot/coreos-init repo
Customize CoreOS Release
This next change is optional, but was a nice indicator to verify that the custom kernel build and installation is working
as intended. We’ll modify our coreos-scripts repo, changing the OS_NAME from “Container Linux by CoreOS” to
“MediaDepot CoreOS”. This simple change will allow us to verify that our customized image (with our kernel changes)
was correctly installed on our server.
We’ll make this change in build_library/set_lsb_release
cat coreos-scripts/build_library/set_lsb_release

...

OS_NAME="MediaDepot CoreOS"
Here’s a diff showing my changes to the mediadepot/coreos-scripts repo
Hosting CoreOS images
Once we build our custom .bin and .iso files, we’ll need to get them off our VM and onto a webserver
that we can use to host our images.
The coreos_install script expects your .bin file to exist in a specific folder structure:
${BASE_URL}/${COREOS_VERSION}/coreos_production_image.bin.bz2
${BASE_URL}/current/version.txt
${BASE_URL}/current/version.txt should be the version.txt generated for the most recent build. Its how coreos_installer knows which is the current version.
Automatic Deployment to GCP Storage
While we could just manually upload these files to our webserver, the CoreOS developers have added built in support for GCP hosting into their scripts. All we need to do is provide the credentials to our GCP account.
We’ll need to do the following:
- Create a GCP Account
- Create a new GCP Project
- Create a Storage Bucket
- Make sure the Bucket is Publically Readable
- Create a new Service Account
- Make sure you give it the
Storage Account Adminrole (it will need permissions to upload and overwrite files) - Create a Private Key, and export as JSON.
- Make sure you give it the
- Rename your Private Key JSON file on your host machine, and move it to the following path
~/.config/gcloud/application_default_credentials.json
Once you’ve done that setup, we’ll need to pass this key file from your host machine into Vagrant, and then update the provisioner.sh script to handle the credentials.
We’ll do that in the next section:
Building our customized CoreOS Image
Now we’re finally ready to build our custom CoreOS images, lets look at our updated Vagrantfile and provisioner.sh
Vagrantfile
cat Vagrantfile

Vagrant.configure("2") do |config|
    config.vm.box = "centos/7"
    config.vm.provider "virtualbox" do |v|
        v.name = "coreos_builder"
        v.memory = 11264
        v.cpus = 4
    end

    # create the gsutil config file. It'll be created on the Host and copied into the VM, where it'll be parsed and a boto file will be created in the chroot.
    config.vm.provision "file", source: "~/.config/gcloud/application_default_credentials.json", destination: "/home/vagrant/.config/gcloud/application_default_credentials.json"

    config.vm.provision "shell", path: "provisioner.sh"
end
Note the change copying the application_default_credentials.json from the Host into the VM above.
Provisioner.sh
cat provisioner.sh

#!/usr/bin/env bash
set -e
set -o pipefail
## Prerequisites

yum install -y \
    ca-certificates \
    curl \
    git \
    bzip2

cd /usr/bin && \
    curl -L -o cork https://github.com/coreos/mantle/releases/download/v0.11.1/cork-0.11.1-amd64 && \
    chmod +x cork && \
    which cork

## Using Cork
# https://coreos.com/os/docs/latest/sdk-modifying-coreos.html=

exec sudo -u vagrant /bin/sh - << 'EOF'
set -e
set -o pipefail
whoami

git config --global user.email "jason@thesparktree.com" && \
git config --global user.name "Jason Kulatunga"

mkdir -p ~/coreos-sdk
cd ~/coreos-sdk
cork create --manifest-url=https://github.com/mediadepot/coreos-manifest.git --manifest-branch=mediadepot
#
cork enter
grep NAME /etc/os-release
env

./set_shared_user_password.sh mediadepot && \
./setup_board --board 'amd64-usr' && \
./build_packages --board 'amd64-usr' && \
./build_image --board 'amd64-usr' prod --upload_root "gs://mediadepot-coreos" --upload && \
./image_to_vm.sh --from=../build/images/amd64-usr/developer-latest --format=iso --board=amd64-usr --upload_root "gs://mediadepot-coreos" --upload && \

# mark this current build as the latest.
gsutil cp ../build/images/amd64-usr/developer-latest/version.txt "gs://mediadepot-coreos/boards/amd64-usr/current/version.txt"

cat ../build/images/amd64-usr/developer-latest/version.txt
EOF
The primary change we made was to add --manifest-url and --manifest-branch flags to to the cork create command, specifying
our forked repo and branch.
You’ll also note the following changes:
./setup_boardand--board- when building a custom CoreOS manifest, you need to specify a board otherwise your build will fail. While I’m not quite clear why its necessary, runningsetup_boardand passing a--board 'amd64-usr'parameter to subsequent commands seemed to fix the issues.--uploadand--upload_root- this informs the relevant scripts that they should check for boto credentials and upload the completed files to the specified GCP storage bucket (with the correct folder structure)gsutil cp- this command will copy a file to the storage bucket, specifying that the “current” version is the one that we just uploaded.
All that left now is to run vagrant destroy -f && vagrant up.
vagrant destroy -f will completely destroy our existing VM, the one we used to build our vanilla CoreOS source. Then we’ll
go rebuild a new VM and provision it with our new script using vagrant up.
Installing our custom Image
Now that we’ve created our custom .iso and .bin files, and made them accessible by our servers, it’s time to create a bootable USB drive or CD, and install CoreOS on our server.
We’ll be creating a bootable USB key.
My favorite tools for doing this are balenaEtcher (macOS, Windows, Linux) and Rufus (Windows).
First we’ll the coreos_production_iso_image.iso from the GCP storage bucket, and then follow the instructions for our chosen tool, making sure to select our .iso as the base image.
Create an ignition.json file.
As part of CoreOS’s headless and security decisions, password authentication is disabled by default. This means that without adding an SSH key for the core user, we won’t be able to login
to our new server.
CoreOS supports a couple of methods for configuration management, but the current recommended one is ignition. Since all we want to do is SSH onto our server and
verify that our custom CoreOS install is working, lets create a barebones ignition.json file on our computer.
cat ignition.json
{
  "ignition": {
    "config": {},
    "security": {
      "tls": {}
    },
    "timeouts": {},
    "version": "2.2.0"
  },
  "networkd": {
  },
  "passwd": {
    "users": [
      {
        "name": "core",
        "sshAuthorizedKeys": [
          "ssh-rsa AAAAB3NzaC1yc2EAAAABJQAAAIEA0QIsn450XjpKdoAicWqu6pgoc7h+lUokibTF75NcLVhrhnOn8aVpV+MemlE6kt6wjZDK7WyTEX1+/4dIFwH92+TJwBRKG8Yd0aTFHjWZg7K/dZAak041sF21D9K+7R0PtZK/B6szbdN9bZtwss2ebuzMu9Pxw3Rzq/PsPfl9nzs="
        ]
      }
    ]
  },
  "storage": {
  },
  "systemd": {
  }
}
You’ll want to ensure that you replace my ssh public key in sshAuthorizedKeys with yours (check ~/.ssh/id_rsa.pub)
After that we’ll want to place it somewhere accessible to the server we’ll be installing CoreOS on. https://transfer.sh/ works in a pinch.
curl --upload-file ./ignition.json https://transfer.sh/ignition.json
Boot our Server from USB
Next we’ll boot our server from this USB. There’s many ways to do this, so you’ll need to figure this out on your own, usually there’s an option in your BIOS to boot from a specific disk/USB.
Once we’ve booted into CoreOS from the USB, it’s time to download our ignition.json file and run the CoreOS installer.
This should install our customized version of CoreOS, if everything worked correctly.
## SERVER ##

# replace the URL below with your transfer.sh url.
curl -O -L https://transfer.sh/vteIu/ignition.json

cat ignition.json # make sure the public key here matches the public key on your host machine

# determine the correct hard disk to install CoreOS on
sudo fdisk -l

# start the CoreOS installer
# make sure you replace `/dev/sda` with the correct hard disk for your machine.
# YOU WILL LOSE DATA IF YOU SELECT THE WRONG DISK

sudo coreos-install -d /dev/sda -V current -i ignition.json
Once coreos-install completes, you’ll need to eject your USB drive and restart your server. On startup the config from
the ignition.json file we specified will be used to configure the Server, allowing us to ssh as the core user.
Validate Custom CoreOS install
After we ssh onto our server (ssh core@{{SERVER_IP}}) we can verify that our custom CoreOS image has been installed:
## SERVER ##

cat /etc/lsb-release

DISTRIB_ID="MediaDepot CoreOS"
DISTRIB_RELEASE=1911.4.0+2018-12-22-0018
DISTRIB_CODENAME="Rhyolite"
DISTRIB_DESCRIPTION="MediaDepot CoreOS 1911.4.0+2018-12-22-0018 (Rhyolite)"
Automatic Custom CoreOS Builds
In Part 3 of this series I’ll discuss the steps required to re-enable the automatic CoreOS kernel updates,
including GPG signing & validation of the .iso and .bin files.