Traefik is the leading open source reverse proxy and load balancer for HTTP and TCP-based applications that is easy, dynamic, automatic, fast, full-featured, production proven, provides metrics, and integrates with every major cluster technology https://containo.us/traefik/
Still not sure what Traefik is? Basically it’s a load balancer & reverse proxy that integrates with docker/kubernetes to automatically route requests to your containers, with very little configuration.
The release of Traefik v2, while adding tons of features, also completely threw away backwards compatibility, meaning that the documentation and guides you can find on the internet are basically useless. It doesn’t help that the auto-magic configuration only works for toy examples. To do anything complicated requires some actual configuration.
This guide assumes you’re somewhat familiar with Traefik, and you’re interested in adding some of the advanced features mentioned in the Table of Contents.
Requirements
- Docker
- A custom domain to assign to Traefik, or a fake domain (.lan) configured for wildcard local development
Base Traefik Docker-Compose
Before we start working with the advanced features of Traefik, lets get a simple example working. We’ll use this example as the base for any changes necessary to enable an advanced Traefik feature.
-
First, we need to create a shared Docker network. Docker Compose (which we’ll be using in the following examples) will create your container(s) but it will also create a docker network specifically for containers defined in the compose file. This is fine until you notice that traefik is unable to route to containers defined in other
docker-compose.ymlfiles, or started manually viadocker runTo solve this, we’ll need to create a shared docker network usingdocker network create traefikfirst. -
Next, lets create a new folder and a
docker-compose.ymlfile. In the subsequent examples, all differences from this config will be bolded.
version: '2'
services:
  traefik:
    image: traefik:v2.2
    ports:
      # The HTTP port
      - "80:80"
    volumes:
      # For Traefik's automated config to work, the docker socket needs to be
      # mounted. There are some security implications to this.
      # See https://docs.docker.com/engine/security/security/#docker-daemon-attack-surface
      # and https://docs.traefik.io/providers/docker/#docker-api-access
      - "/var/run/docker.sock:/var/run/docker.sock:ro"
    command:
      - --providers.docker
      - --entrypoints.web.address=:80
      - --providers.docker.network=traefik
    networks:
      - traefik

# Use our previously created `traefik` docker network, so that we can route to
# containers that are created in external docker-compose files and manually via
# `docker run`
networks:
  traefik:
    external: true
WebUI Dashboard
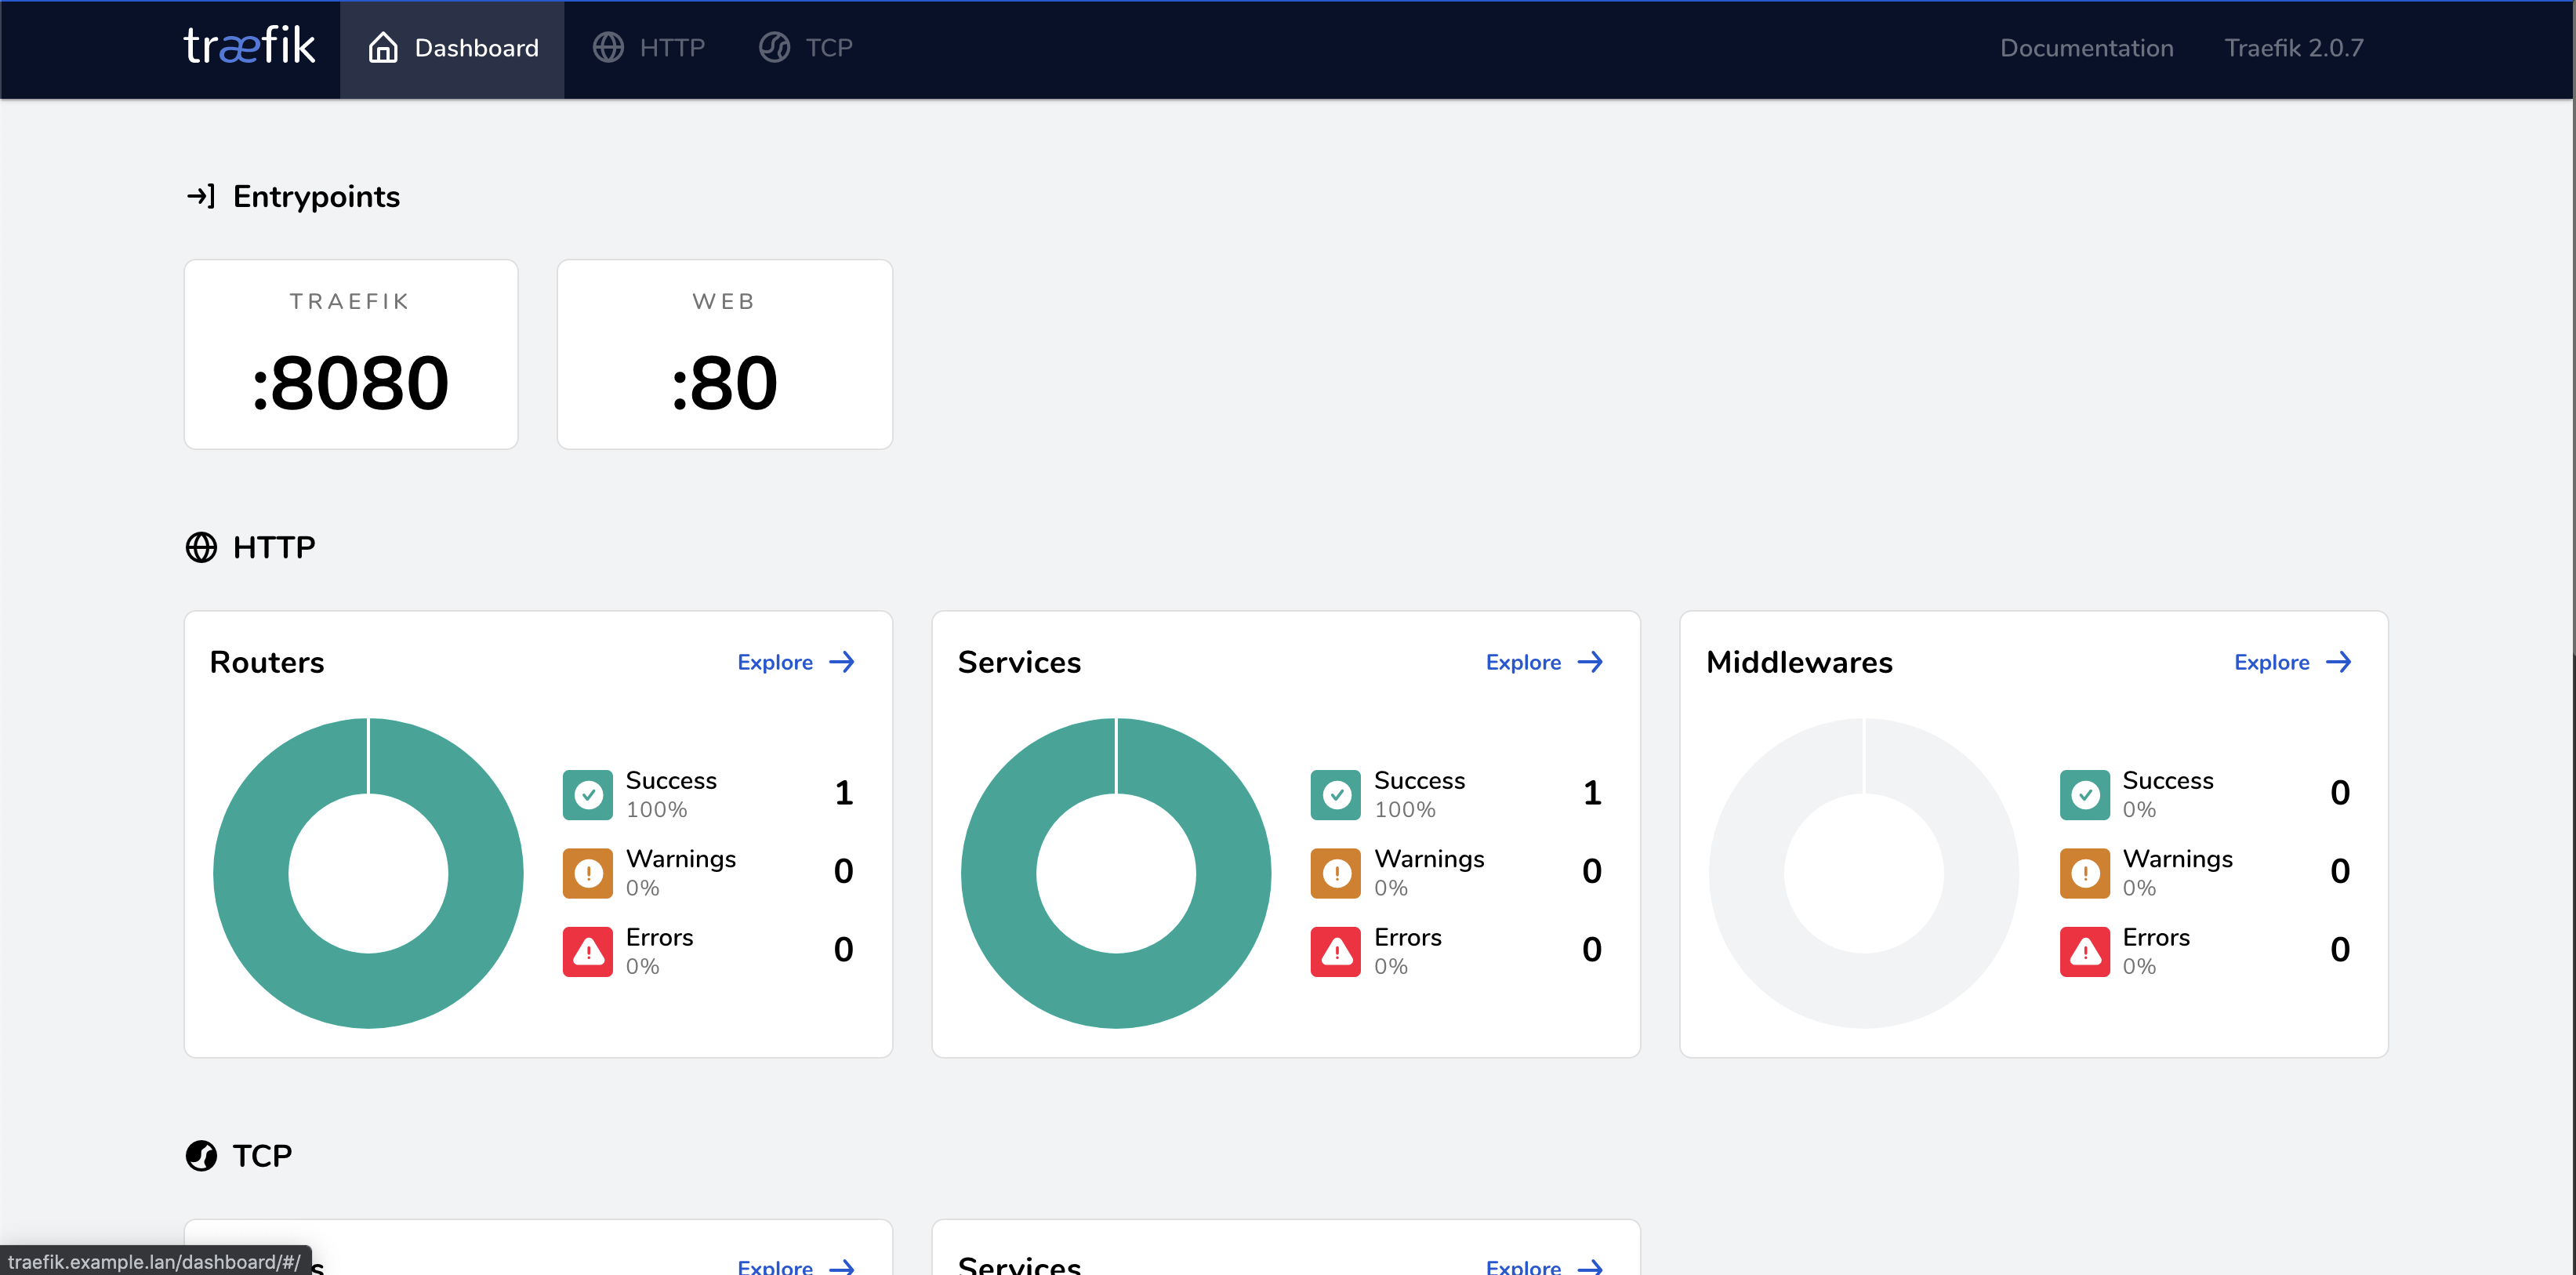
First, lets start by enabling the built in Traefik dashboard. This dashboard is useful for debugging as we enable other advanced features, however you’ll want to ensure that it’s disabled in production.
version: '2'
services:
  traefik:
    image: traefik:v2.2
    ports:
      - "80:80"
      # The Web UI (enabled by --api.insecure=true)
      - "8080:8080"
    volumes:
      - "/var/run/docker.sock:/var/run/docker.sock:ro"
    command:
      - --providers.docker
      - --entrypoints.web.address=:80
      - --providers.docker.network=traefik
      - --api.insecure=true
    labels:
      - 'traefik.http.routers.traefik.rule=Host(`traefik.example.com`)'
      - 'traefik.http.routers.traefik.service=api@internal'
    networks:
      - traefik
networks:
  traefik:
    external: true
In a browser, just open up http://traefik.example.com or the domain name you specified in the traefik.http.routers.traefik.rule label.
You should see the following dashboard:
Automatic Subdomain Routing
One of the most useful things about Traefik is its ability to dynamically route traffic to containers.
Rather than have to explicitly assign a domain or subdomain for each container, you can tell Traefik to use the container name
(or service name in a docker-compose file) prepended to a domain name for dynamic routing. eg. container_name.example.com
version: '2'
services:
  traefik:
    image: traefik:v2.2
    ports:
      - "80:80"
    volumes:
      - "/var/run/docker.sock:/var/run/docker.sock:ro"
    command:
      - --providers.docker
      - --entrypoints.web.address=:80
      - --providers.docker.network=traefik
      - '--providers.docker.defaultRule=Host(`{{ normalize .Name }}.example.com`)'
    networks:
      - traefik
networks:
  traefik:
    external: true
Next, lets start up a Docker container running the actual server that we want to route to.
docker run \
    --rm \
    --label 'traefik.http.services.foo.loadbalancer.server.port=80' \
    --name 'foo' \
    --network=traefik \
    containous/whoami
Whenever a container starts Traefik will interpolate the defaultRule and configure a router for this container.
In this example, we’ve specified that the container name is foo, so the container will be accessible at
foo.example.com
Note: if your service is running in another docker-compose file,
{{ normalize .Name }}will be interpolated as:service_name-folder_name, so your container will be accessible atservice_name-folder_name.example.com
Override Subdomain Routing using Container Labels
You can override the default routing rule (providers.docker.defaultRule) for your container by adding a traefik.http.routers.*.rule label.
docker run \
    --rm \
    --label 'traefik.http.services.foo.loadbalancer.server.port=80' \
    --label 'traefik.http.routers.foo.rule=Host(`bar.example.com`)'
    --name 'foo' \
    --network=traefik \
    containous/whoami
Restrict Scope
By default Traefik will watch for all containers running on the Docker daemon, and attempt to automatically configure routes and services for each.
If you’d like a litte more control, you can pass the --providers.docker.exposedByDefault=false CMD argument to the Traefik container and selectively
enable routing for your containers by adding a traefik.enable=true label.
version: '2'
services:
  traefik:
    image: traefik:v2.2
    ports:
      - "80:80"
    volumes:
      - "/var/run/docker.sock:/var/run/docker.sock:ro"
    command:
      - --providers.docker
      - --entrypoints.web.address=:80
      - --providers.docker.network=traefik
      - '--providers.docker.defaultRule=Host(`{{ normalize .Name }}.example.com`)'
      - '--providers.docker.exposedByDefault=false'
    networks:
      - traefik

  hellosvc:
    image: containous/whoami
    labels:
      - traefik.enable=true
    networks:
      - traefik
networks:
  traefik:
    external: true
As I mentioned earlier, normalize .Name will be interpolated as service_name-folder_name for containers started via docker-compose.
So my Hello-World test container will be accessible as hellosvc-tmp.example.com on my local machine.
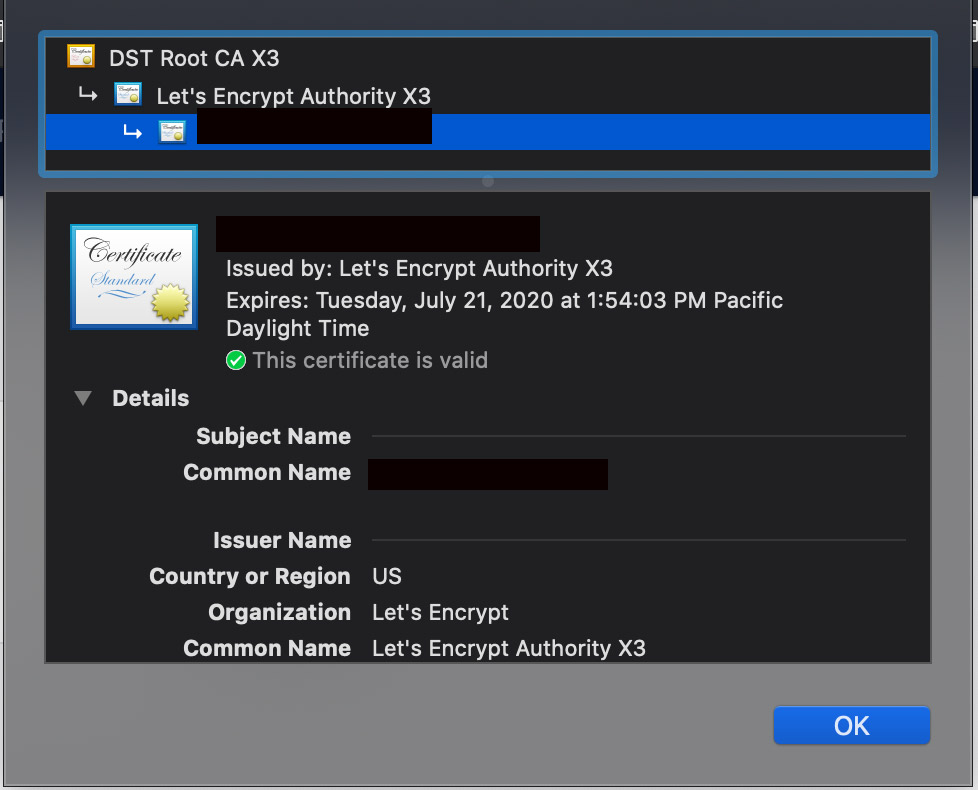
Automated SSL Certificates using LetsEncrypt DNS Integration
Next, lets look at how to securely access Traefik managed containers over SSL using LetsEncrypt certificates.
The great thing about this setup is that Traefik will automatically request and renew the SSL certificate for you, even if your site is not accessible on the public internet.
version: '2'
services:
  traefik:
    image: traefik:v2.2
    ports:
      - "80:80"
      # The HTTPS port
      - "443:443"
    volumes:
      - "/var/run/docker.sock:/var/run/docker.sock:ro"
      # It's a good practice to persist the Letsencrypt certificates so that they don't change if the Traefik container needs to be restarted.
      - "./letsencrypt:/letsencrypt"
    command:
      - --providers.docker
      - --entrypoints.web.address=:80
      - --entrypoints.websecure.address=:443
      - --providers.docker.network=traefik
      - '--providers.docker.defaultRule=Host(`{{ normalize .Name }}.example.com`)'
      # We're going to use the DNS challenge since it allows us to generate
      # certificates for intranet/lan sites as well
      - "--certificatesresolvers.mydnschallenge.acme.dnschallenge=true"
      # We're using cloudflare for this example, but many DNS providers are
      # supported: https://docs.traefik.io/https/acme/#providers
      - "--certificatesresolvers.mydnschallenge.acme.dnschallenge.provider=cloudflare"
      - "--certificatesresolvers.mydnschallenge.acme.email=postmaster@example.com"
      - "--certificatesresolvers.mydnschallenge.acme.storage=/letsencrypt/acme.json"
    environment:
      # We need to provide credentials to our DNS provider.
      # See https://docs.traefik.io/https/acme/#providers
      - "CF_DNS_API_TOKEN=XXXXXXXXX"
      - "CF_ZONE_API_TOKEN=XXXXXXXXXX"
    networks:
      - traefik

  hellosvc:
    image: containous/whoami
    labels:
      - traefik.http.routers.hellosvc.entrypoints=websecure
      - 'traefik.http.routers.hellosvc.tls.certresolver=mydnschallenge'
    networks:
      - traefik
networks:
  traefik:
    external: true
Now we can visit our Hello World container by visiting https://hellosvc-tmp.example.com.
Note: Traefik requires additional configuration to automatically redirect HTTP to HTTPS. See the instructions in the next section.
Automatically Redirect HTTP -> HTTPS.
version: '2'
services:
  traefik:
    image: traefik:v2.2
    ports:
      - "80:80"
      # The HTTPS port
      - "443:443"
    volumes:
      - "/var/run/docker.sock:/var/run/docker.sock:ro"
      - "./letsencrypt:/letsencrypt"
    command:
      - --providers.docker
      - --entrypoints.web.address=:80
      - --entrypoints.websecure.address=:443
      - --entrypoints.web.http.redirections.entryPoint.to=websecure
      - --entrypoints.web.http.redirections.entryPoint.scheme=https
      - --providers.docker.network=traefik
      - '--providers.docker.defaultRule=Host(`{{ normalize .Name }}.example.com`)'
      - "--certificatesresolvers.mydnschallenge.acme.dnschallenge=true"
      - "--certificatesresolvers.mydnschallenge.acme.dnschallenge.provider=cloudflare"
      - "--certificatesresolvers.mydnschallenge.acme.email=postmaster@example.com"
      - "--certificatesresolvers.mydnschallenge.acme.storage=/letsencrypt/acme.json"

    environment:
      - "CF_DNS_API_TOKEN=XXXXXXXXX"
      - "CF_ZONE_API_TOKEN=XXXXXXXXXX"
    networks:
      - traefik

  hellosvc:
    image: containous/whoami
    labels:
      - traefik.http.routers.hellosvc.entrypoints=websecure
      - 'traefik.http.routers.hellosvc.tls.certresolver=mydnschallenge'
    networks:
      - traefik
networks:
  traefik:
    external: true
Note, the --entrypoints.web.http.redirections.entryPoint.* command line flags are only available in Traefik v2.2+. If you need HTTP to HTTPS
redirection for Traefik v2.0 or v2.1, you’ll need to add the following labels instead:
traefik:
  ....
  labels:
    - traefik.http.routers.https-redirect.entrypoints=web
    - traefik.http.routers.https-redirect.rule=HostRegexp(`{any:.*}`)
    - traefik.http.routers.https-redirect.middlewares=https-only
    - traefik.http.middlewares.https-only.redirectscheme.scheme=https
2FA, SSO and SAML
Traefik supports using an external service to check for credentials. This external service can then be used to enable single sign on (SSO) for your apps, including 2FA and/or SAML.
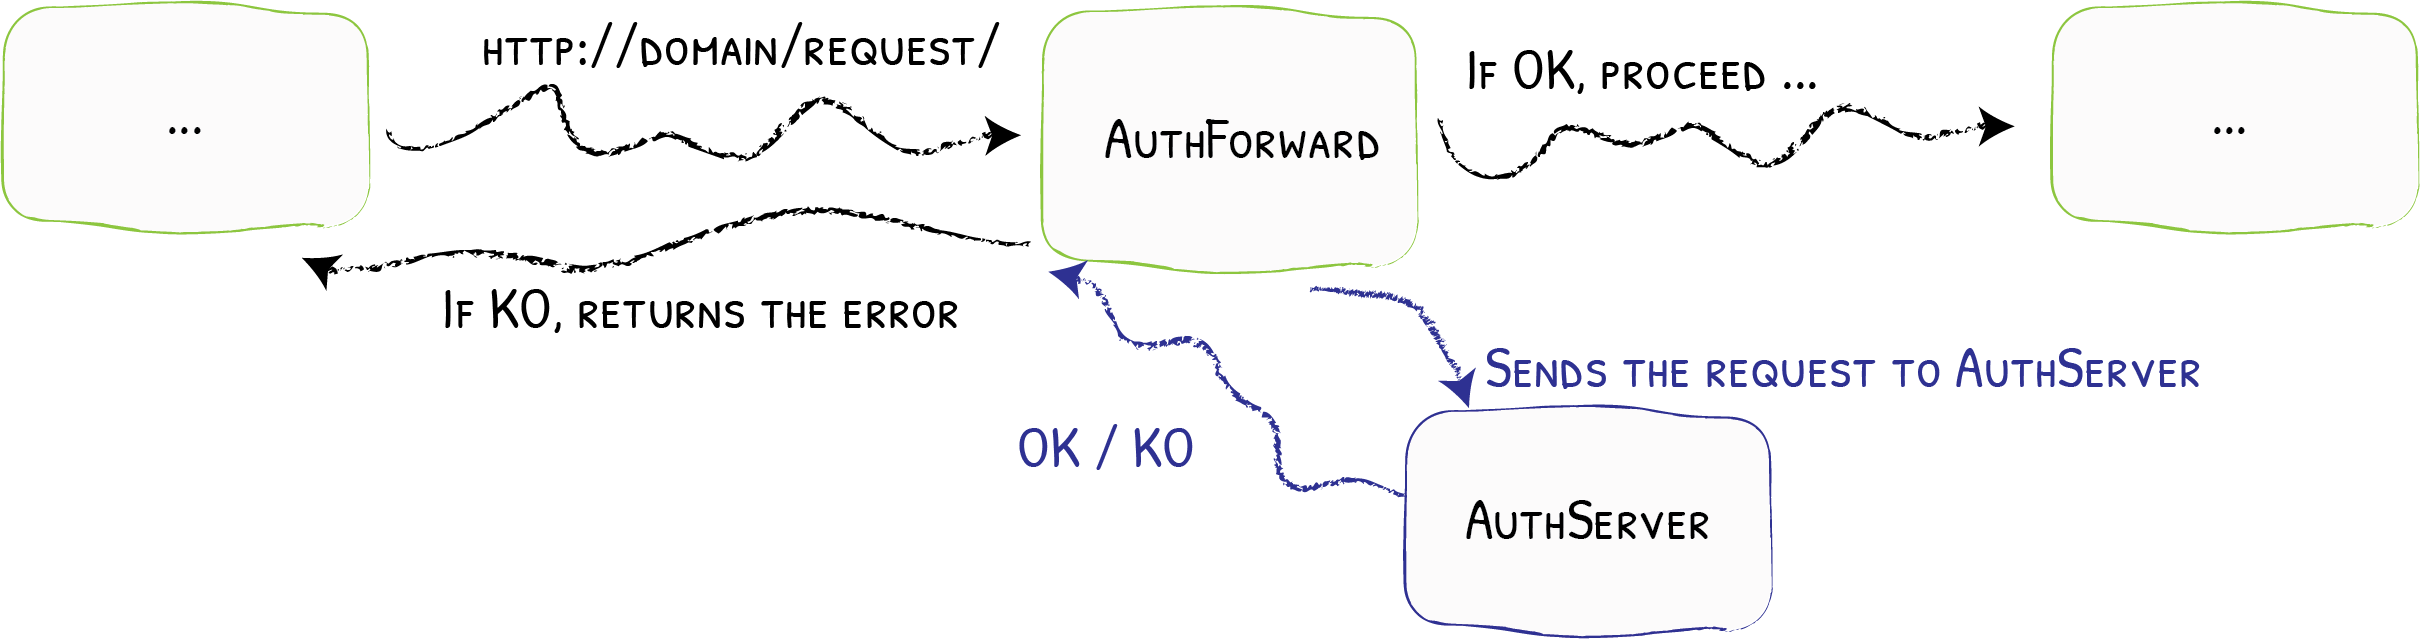
In this example, I’ll be using Authelia to enable SSO, but please note that Authelia does not support SAML, only 2FA and Forward Auth.
Authelia requires HTTPS, so we’ll base our Traefik configuration on the previous example (Traefik with Letsencrypt certificates & Http to Https redirects)
version: '2'
services:
  traefik:
    image: traefik:v2.2
    ports:
      - "80:80"
      # The HTTPS port
      - "443:443"
    volumes:
      - "/var/run/docker.sock:/var/run/docker.sock:ro"
      - "./letsencrypt:/letsencrypt"
    command:
      - --providers.docker
      - --entrypoints.web.address=:80
      - --entrypoints.websecure.address=:443
      - --entrypoints.web.http.redirections.entryPoint.to=websecure
      - --entrypoints.web.http.redirections.entryPoint.scheme=https
      - --providers.docker.network=traefik
      - '--providers.docker.defaultRule=Host(`{{ normalize .Name }}.example.com`)'
      - "--certificatesresolvers.mydnschallenge.acme.dnschallenge=true"
      - "--certificatesresolvers.mydnschallenge.acme.dnschallenge.provider=cloudflare"
      - "--certificatesresolvers.mydnschallenge.acme.email=postmaster@example.com"
      - "--certificatesresolvers.mydnschallenge.acme.storage=/letsencrypt/acme.json"

    environment:
      - "CF_DNS_API_TOKEN=XXXXXXXXX"
      - "CF_ZONE_API_TOKEN=XXXXXXXXXX"
    networks:
      - traefik

  authelia:
    image: authelia/authelia
    volumes:
      - './authelia/configuration.yml:/etc/authelia/configuration.yml:ro'
      - './authelia/users_database.yml:/etc/authelia/users_database.yml:ro'
      - './authelia/data:/etc/authelia/data:rw'
    environment:
      - 'TZ=America/Los_Angeles'
    labels:
      - 'traefik.http.services.authelia.loadbalancer.server.port=9091'
      - 'traefik.http.routers.authelia.rule=Host(`login.example.com`)'
      - 'traefik.http.routers.authelia.entrypoints=websecure'
      - 'traefik.http.routers.authelia.tls.certresolver=mydnschallenge'
    networks:
      - traefik

  hellosvc:
    image: containous/whoami
    labels:
      - traefik.http.routers.hellosvc.entrypoints=websecure
      - 'traefik.http.routers.hellosvc.tls.certresolver=mydnschallenge'
      - 'traefik.http.routers.hellosvc.middlewares=authme'

      # this forwardauth.address is complex but incredibly important.
      # http://authelia:9091 is the internal routable container name.
      # https://login.example.com is the external url for authelia
      - 'traefik.http.middlewares.authme.forwardauth.address=http://authelia:9091/api/verify?rd=https://login.example.com/'
      - 'traefik.http.middlewares.authme.forwardauth.trustforwardheader=true'
      - 'traefik.http.middlewares.authme.forwardauth.authresponseheaders=X-Forwarded-User'
    networks:
      - traefik

networks:
  traefik:
    external: true
In the above docker-compose.yml file, under the authelia service, 2 config files are referenced configuration.yml and users_database.yml.
configuration.yml is the configuration file for Authelia. Here’s an example of what that file looks like. You will need ensure that
all references to the example.com domain are replaced with your chosen (sub)domain.
See config.template.yml on github for a comprehensive list of options.
###############################################################
#                   Authelia configuration                    #
###############################################################

# The host and port to listen on
host: 0.0.0.0
port: 9091

# Level of verbosity for logs: info, debug, trace
log_level: info

# The secret used to generate JWT tokens when validating user identity by
# email confirmation.
jwt_secret: change_this_secret

# Default redirection URL
#
# If user tries to authenticate without any referer, Authelia
# does not know where to redirect the user to at the end of the
# authentication process.
# This parameter allows you to specify the default redirection
# URL Authelia will use in such a case.
#
# Note: this parameter is optional. If not provided, user won't
# be redirected upon successful authentication.
default_redirection_url: http://example.com/

# TOTP Issuer Name
#
# This will be the issuer name displayed in Google Authenticator
# See: https://github.com/google/google-authenticator/wiki/Key-Uri-Format for more info on issuer names
totp:
  issuer: authelia.com

# Duo Push API
#
# Parameters used to contact the Duo API. Those are generated when you protect an application
# of type "Partner Auth API" in the management panel.
# duo_api:
#   hostname: api-123456789.example.com
#   integration_key: ABCDEF
#   secret_key: 1234567890abcdefghifjkl

# The authentication backend to use for verifying user passwords
# and retrieve information such as email address and groups
# users belong to.
#
# There are two supported backends: `ldap` and `file`.
authentication_backend:

  # File backend configuration.
  #
  # With this backend, the users database is stored in a file
  # which is updated when users reset their passwords.
  # Therefore, this backend is meant to be used in a dev environment
  # and not in production since it prevents Authelia to be scaled to
  # more than one instance.
  #
  file:
    path: /etc/authelia/users_database.yml

# Access Control
#
# Access control is a list of rules defining the authorizations applied for one
# resource to users or group of users.
#
# If 'access_control' is not defined, ACL rules are disabled and the `bypass`
# rule is applied, i.e., access is allowed to anyone. Otherwise restrictions follow
# the rules defined.
#
# Note: One can use the wildcard * to match any subdomain.
# It must stand at the beginning of the pattern. (example: *.mydomain.com)
#
# Note: You must put patterns containing wildcards between simple quotes for the YAML
# to be syntactically correct.
#
# Definition: A `rule` is an object with the following keys: `domain`, `subject`,
# `policy` and `resources`.
#
# - `domain` defines which domain or set of domains the rule applies to.
#
# - `subject` defines the subject to apply authorizations to. This parameter is
#    optional and matching any user if not provided. If provided, the parameter
#    represents either a user or a group. It should be of the form 'user:<username>'
#    or 'group:<groupname>'.
#
# - `policy` is the policy to apply to resources. It must be either `bypass`,
#   `one_factor`, `two_factor` or `deny`.
#
# - `resources` is a list of regular expressions that matches a set of resources to
#    apply the policy to. This parameter is optional and matches any resource if not
#    provided.
#
# Note: the order of the rules is important. The first policy matching
# (domain, resource, subject) applies.
access_control:
  # Default policy can either be `bypass`, `one_factor`, `two_factor` or `deny`.
  # It is the policy applied to any resource if there is no policy to be applied
  # to the user.
  default_policy: deny

  rules:
    # Rules applied to everyone

    - domain: "*.example.com"
      policy: one_factor

# Configuration of session cookies
#
# The session cookies identify the user once logged in.
session:
  # The name of the session cookie. (default: authelia_session).
  name: authelia_session

  # The secret to encrypt the session cookie.
  secret: change_this_secret

  # The time in seconds before the cookie expires and session is reset.
  expiration: 3600 # 1 hour

  # The inactivity time in seconds before the session is reset.
  inactivity: 300 # 5 minutes

  # The domain to protect.
  # Note: the authenticator must also be in that domain. If empty, the cookie
  # is restricted to the subdomain of the issuer.
  domain: example.com

# Configuration of the authentication regulation mechanism.
#
# This mechanism prevents attackers from brute forcing the first factor.
# It bans the user if too many attempts are done in a short period of
# time.
regulation:
  # The number of failed login attempts before user is banned.
  # Set it to 0 to disable regulation.
  max_retries: 3

  # The time range during which the user can attempt login before being banned.
  # The user is banned if the authentication failed `max_retries` times in a `find_time` seconds window.
  find_time: 120

  # The length of time before a banned user can login again.
  ban_time: 300

# Configuration of the storage backend used to store data and secrets.
#
# You must use only an available configuration: local, sql
storage:
  # The directory where the DB files will be saved
  local:
    path: /etc/authelia/data/db.sqlite3

# Configuration of the notification system.
#
# Notifications are sent to users when they require a password reset, a u2f
# registration or a TOTP registration.
# Use only an available configuration: filesystem, gmail
notifier:
  # For testing purpose, notifications can be sent in a file
  filesystem:
    filename: /etc/authelia/data/notification.txt

  # Sending an email using a Gmail account is as simple as the next section.
  # You need to create an app password by following: https://support.google.com/accounts/answer/185833?hl=en
  ## smtp:
  ##   username: myaccount@gmail.com
  ##   password: yourapppassword
  ##   sender: admin@example.com
  ##   host: smtp.gmail.com
  ##   port: 587
In this example we use a hard coded user database, defined in users_database.yml. Authelia also supports LDAP integration.
See the password-hash-algorithm-tuning documentation for more information.
users:
  testuser: ## I have set the password below to 'test' for you
    password: '{CRYPT}$6$rounds=500000$Bui4ldW5hXOI9qwJ$IUHQPCusUKpTs/OrfE9UuGb1Giqaa5OZA.mqIpH.Hh8RGFsEBHViCwQDx6DfkGUiF60pqNubFBugfTvCJIDNw1'
    email: your@email.address
    groups:
      - admins
      - dev
Once you start your docker-compose file and try to access the hellosvc url, you’ll be redirected automatically to the Authelia login page.
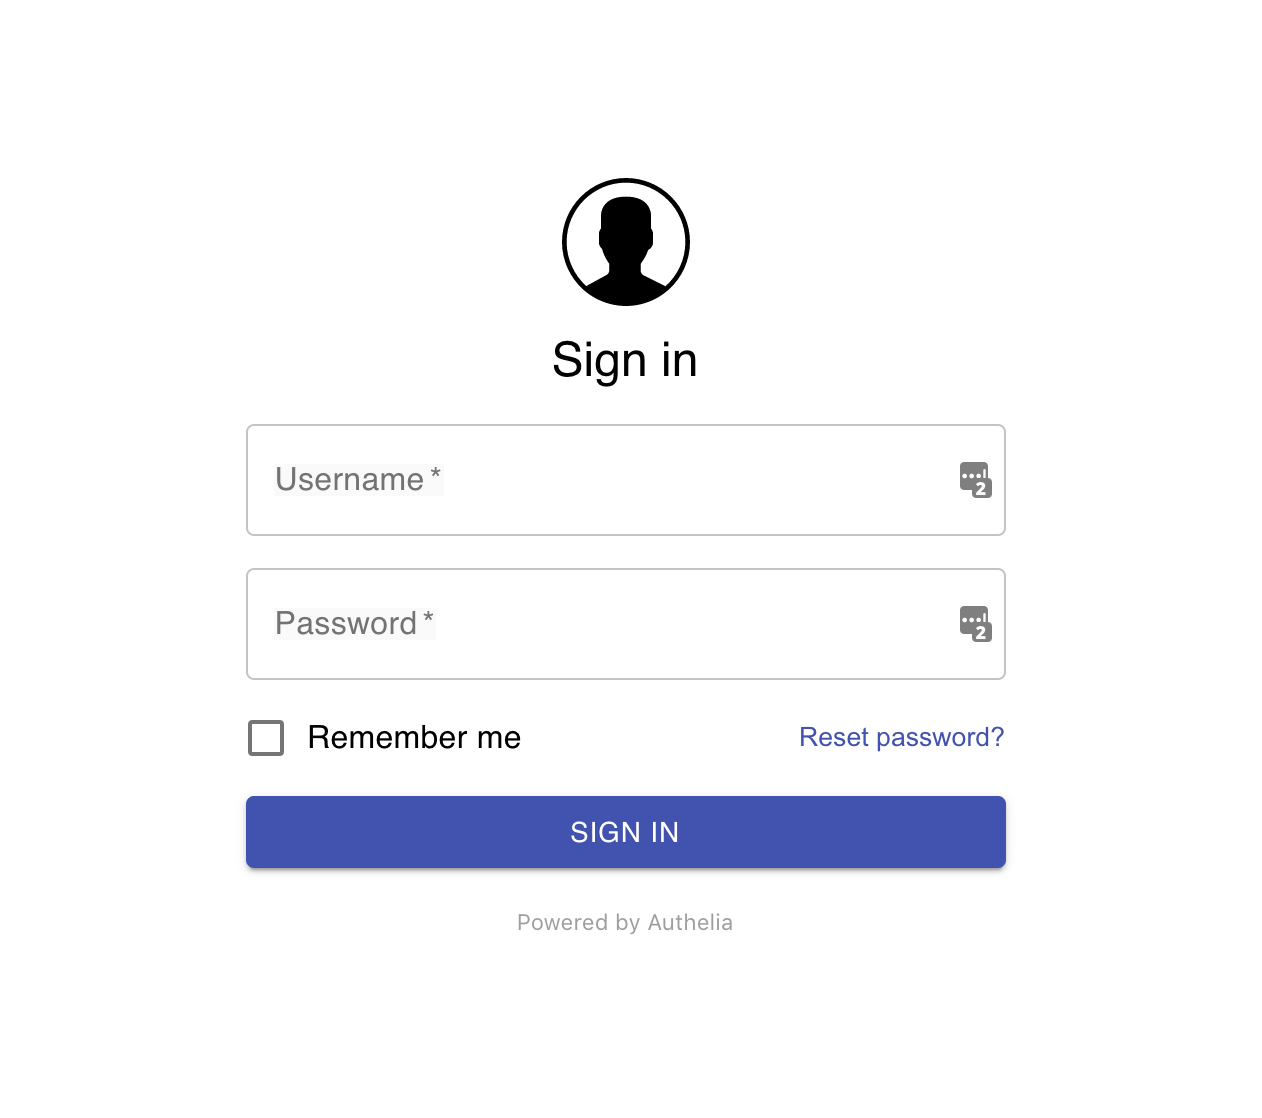
Fin.
As you can see, Traefik v2 is pretty powerful, if a bit verbose with its configuration syntax. With its native docker integration, support for LetsEncrypt and SSO, it’s become a staple of my docker based server environments.